#DR is the format used in GTA V for map models, and weapons.
#dr in PC version of GTAV got extension .ydr wheres prefix y stands for win64pc/win64/x64/linux platform
Here what you can find on this page:Embedded Textures (3dsMax)
Changing Embedded Textures without 3dsMax
Embedded Textures (Zmodeler3)
Using materials from other ydr (3dsMax)
Saving/reusing shader settings (3dsMax)
Embedded collision (3dsMax)
Embedded LOD (3dsMax)
Embedded Textures (3dsMax)
#DR contains embedded textures or can use external textures from #TD - texture dictionary.
(more info about external textures: here)
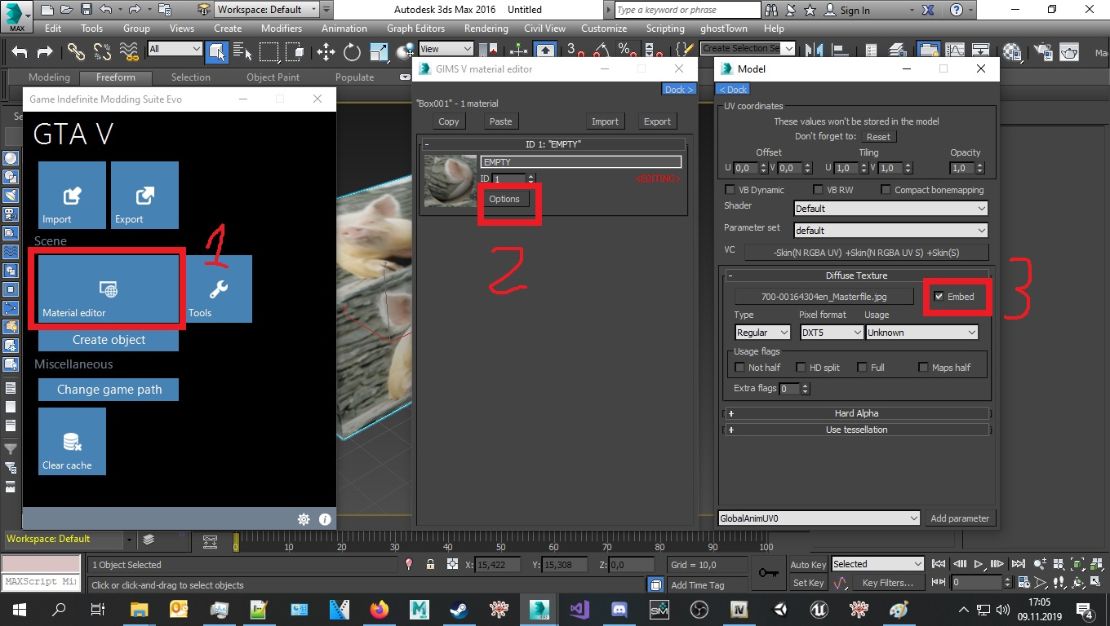
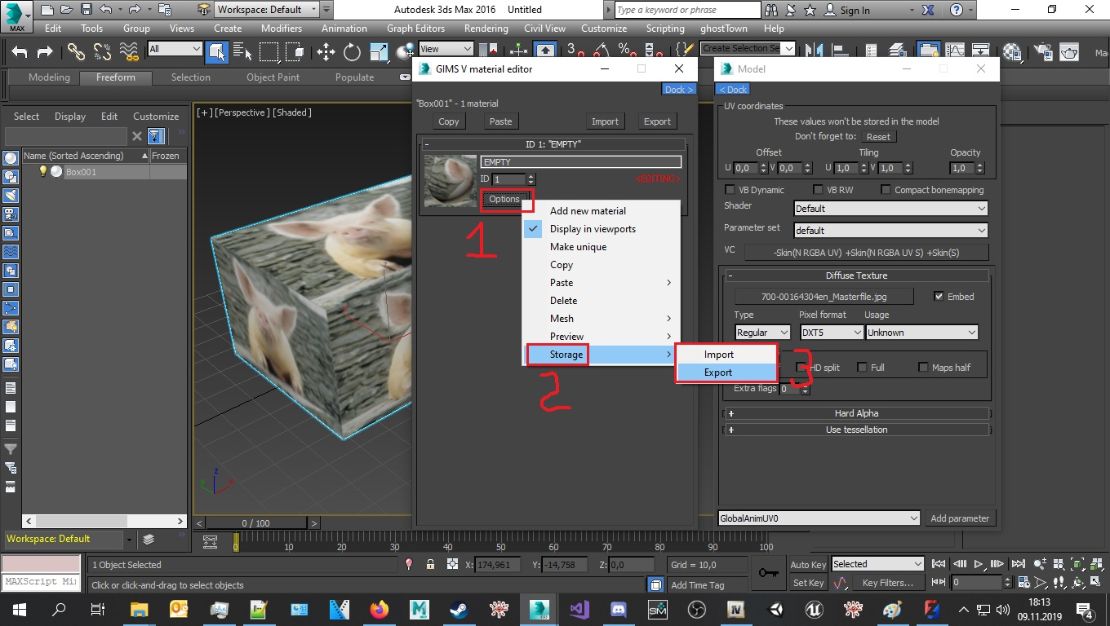
To embed textures in 3ds max select Material Editor in GIMS, Options in material then check checkbox embed:
(if this checkbox will be unchecked #dr will use textures from #td)
(more info about external textures: here)
To embed textures in 3ds max select Material Editor in GIMS, Options in material then check checkbox embed:
(if this checkbox will be unchecked #dr will use textures from #td)
Changing Embedded Textures without 3dsMax
To change embedded texture in #dr without 3dsMax use OpenIV to export #dr into .odr OpenFormats:
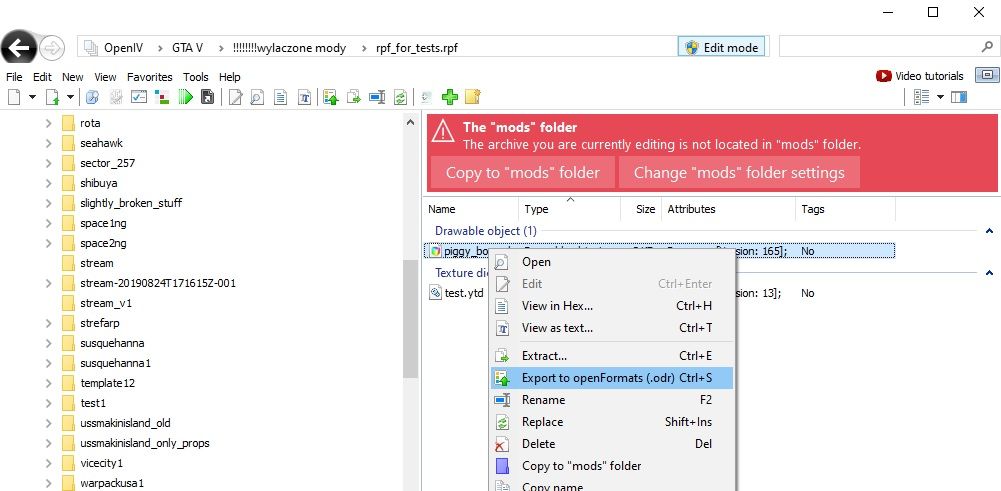
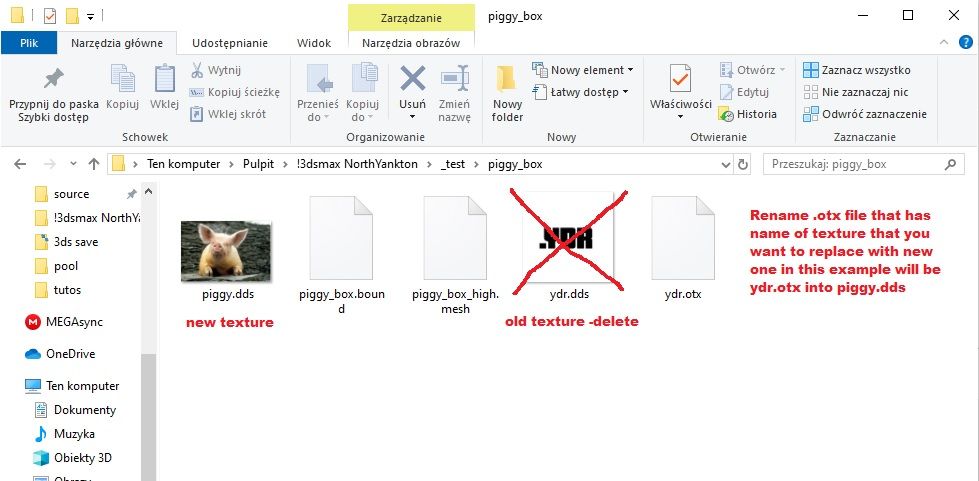
You will have name.odr file and folder with same name like odr:
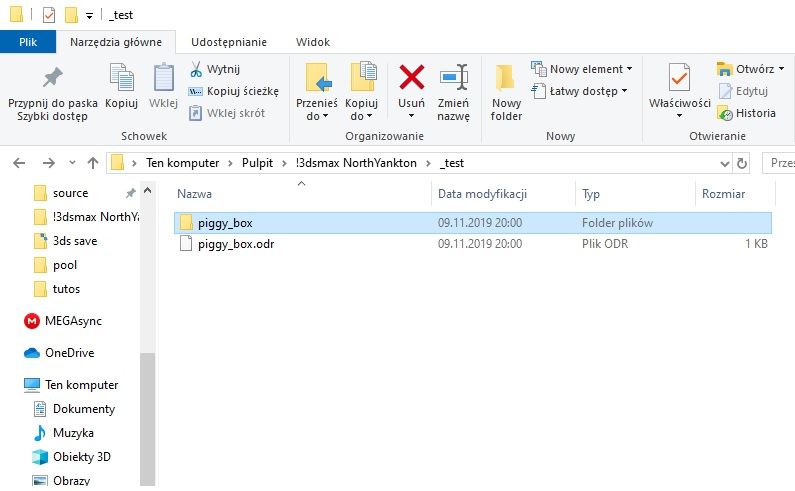
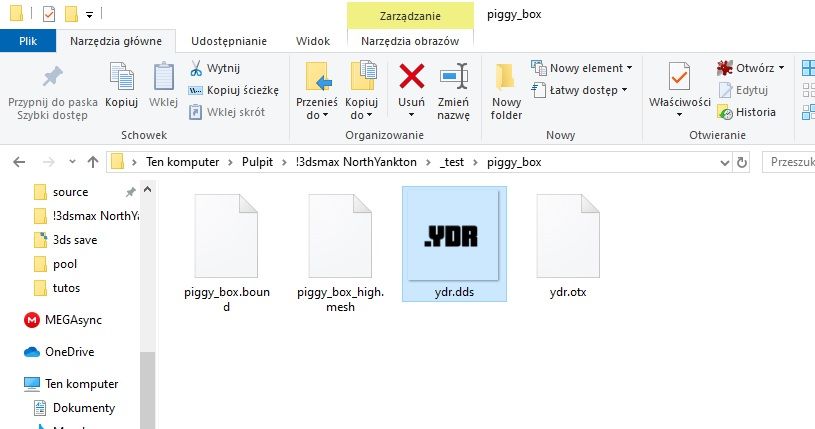
Inside that folder will be embedded textures in .DDS format where you can change any texture like you want.
Iportant thing is that new texture must be named same as texture that you want to replace.
Iportant thing is that new texture must be named same as texture that you want to replace.
To add new texture with new name you need:
Add new .DDS texture to odr folder
Delete old texture
Rename .otx file that has name of texture that you want replace with new one to name of new texture:
Add new .DDS texture to odr folder
Delete old texture
Rename .otx file that has name of texture that you want replace with new one to name of new texture:
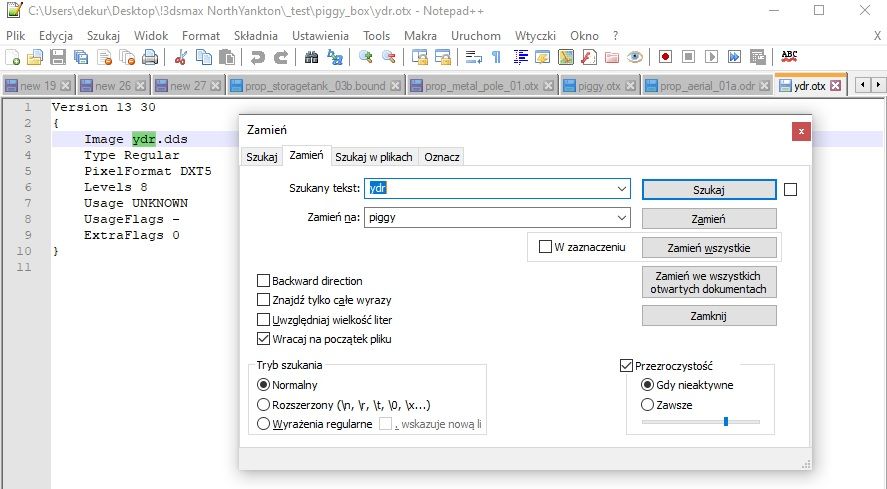
Now edit renamed .otx file with notepad and replace old texture name with new texture name:
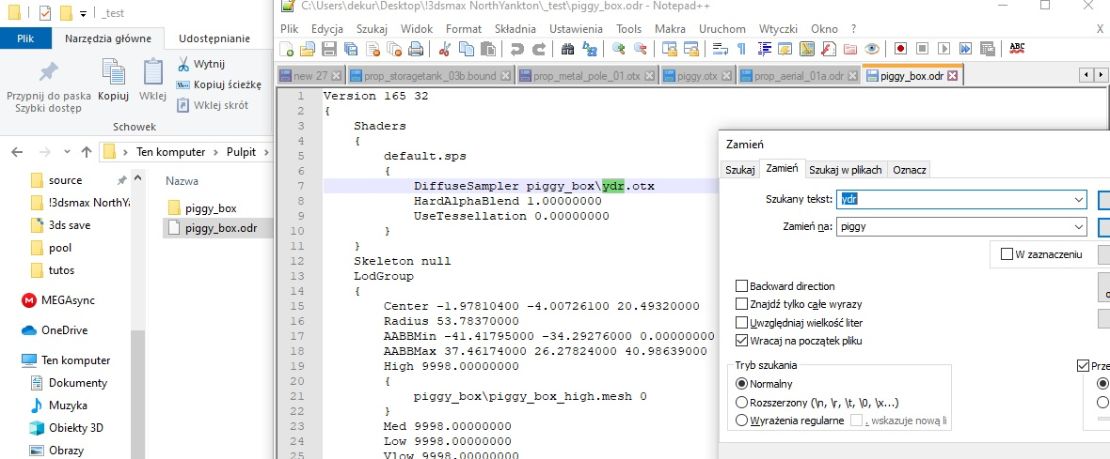
Now open .odr file with notepad and too replace old texture name with new texture name:
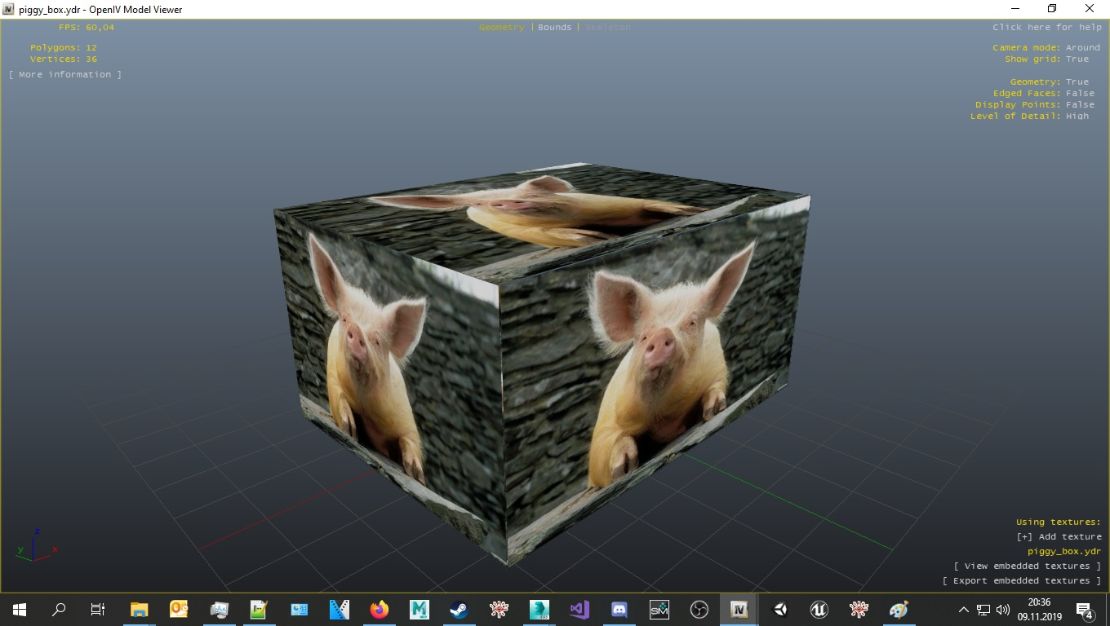
Now import .odr into OpenIV and you can see embedded texture for new one with different name was succesfully changed:
Embedded Textures (Zmodeler3)
To embed textures into #dr in Zmodeler3 you need to name group same as main #dr node. Also you need to add .ydr at end of group name in Textures Browser:

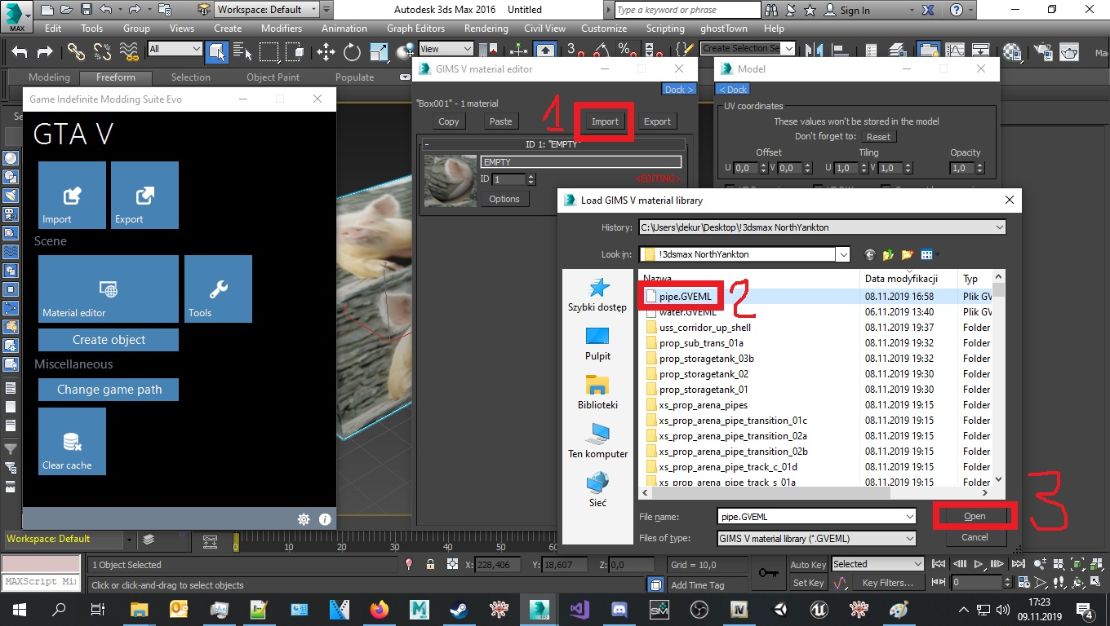
Using materials from other #dr (3dsMax)
You can reuse materials used in other #dr. To do that you need first export materials from one #dr and save them to .GVEML file (all materials will be exported):

Now in second #dr you need to import all previous exported materials:
Saving/reusing shader settings (3dsMax)
If you want to use specific settings for shader (for example same as in vanilla object shader) or want to save your settings for shader first you need to export it into .EGVM file then import it into selected shader:
Embedded collision (3dsMax)
YDR contain embedded collision or can use external #BN static collision (more about #BN here)
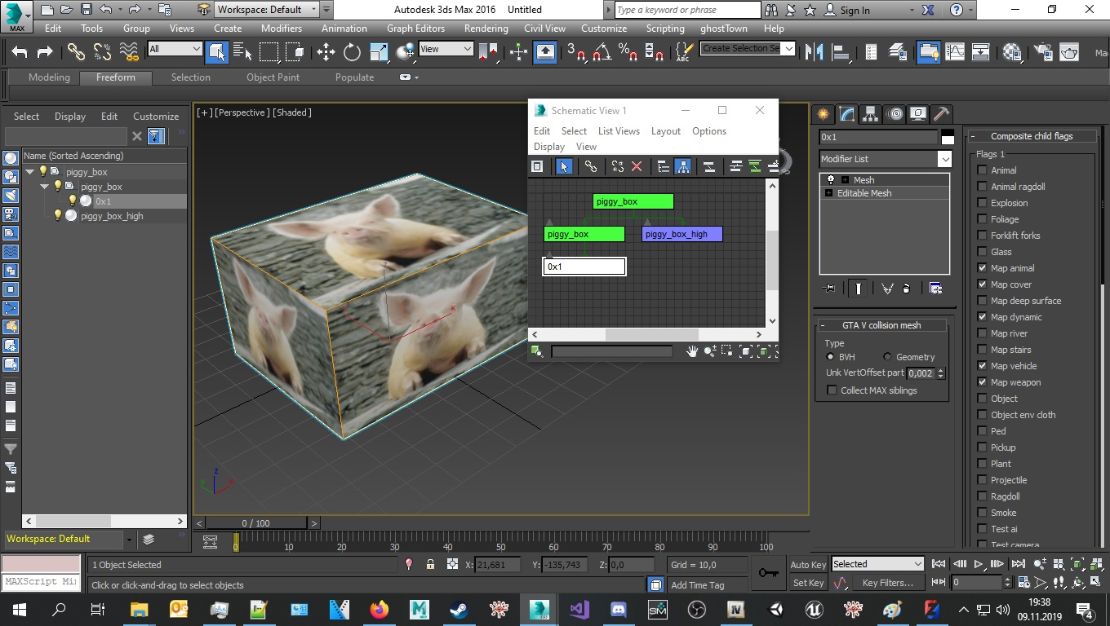
In creating embeded collision important is hierarchy, flags and Unk VertOffset
In creating embeded collision important is hierarchy, flags and Unk VertOffset
Collision Flags:
Flags 1
- Map Animal
- Map Cover
- Map Dynamic
- Map Vehicle
- Map Weapon
Flags 2
- Animal
- Animal Ragdoll
- Forklift Forks
- Glass
- Object
- Ped
- Plant
- Projectile
- Ragdoll
- Test AI
- Test Camera
- Test Script
- Test Vehicle Wheel
- Test Weapon
- Vehicle BVH
- Vehicle Not BVH
For stairs add stairs in Flag1- but dont add stairs flag to ground cuz it will change moving animation for player
For Unk VertOffset use 0,002 but if collision mesh is simple with small amount of vertex then use 0,02
Hierarchy:
And heres example how to create #dr with embedded collision and textures ©Rarefacer:
Embedded LOD (3dsMax)
#DR can contain embedded LOD or use external ones in LOD parenting (more about LOD parenting here)
Heres tuto how create embedded LODs:
Heres tuto how create embedded LODs:
Make sure that each level of detail has reduced amount of vertexes and polys. Dont just copy meshes with same amount of details cuz theres no sense for LOD. Use ProOptimizer for example:
high mesh 25000 vertexes
medium mesh 18000 vertexes
low mesh 8000 vertexes
very low mesh 5000 vertexes
Above is just example dont use it as reference! Its just to show how much vertexes will be displayed when LODs will be switched and if you will have same amount of vertexes for each lvl theres no sense for LOD cuz it will be displayed same amount of vertexes.
© 2019-2022 All rights reserved by Dekurwinator.